Spotify Import Guide
To be able to import your Spotify streaming history, you need to have stats.fm Plus.
1. Request your data from Spotify
In order to request the extended streaming history files, simply press the correct buttons on the Spotify website.
To get started, open the Privacy page on the Spotify website.
Scroll down to the "Download your data" section.
Configure the page so it looks like the screenshot below (Unticked the "Account data" and ticked the "Extended streaming history" boxes).
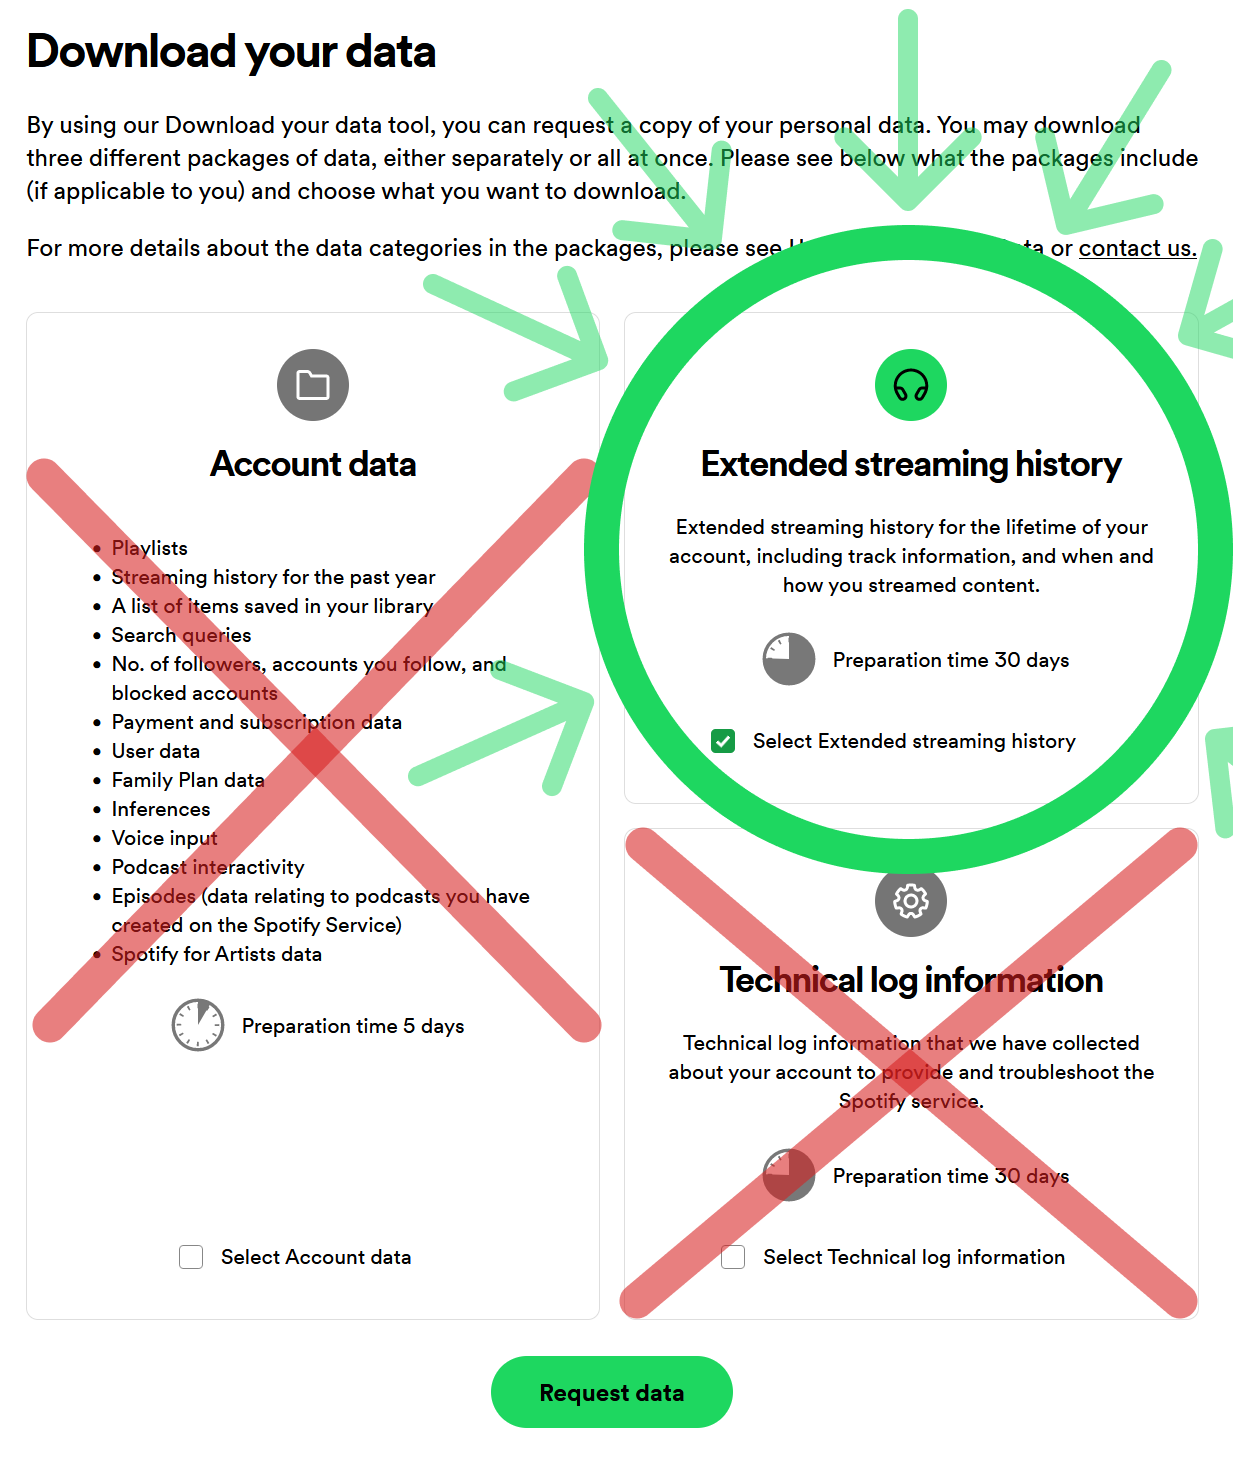
Press the "Request data" button.
2. Confirm your request
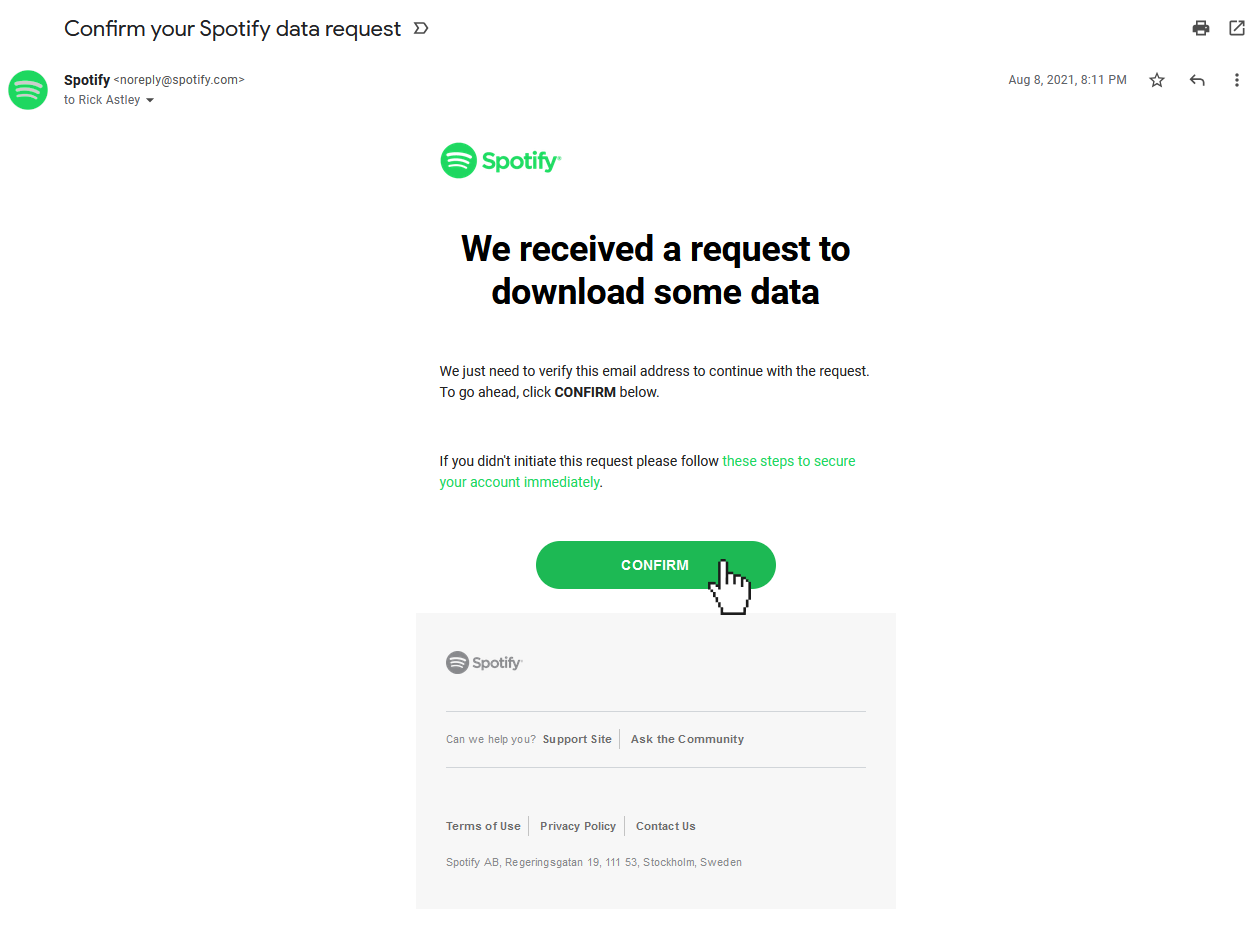
As soon as your request is accepted by Spotify, you'll receive a link to confirm the request in your email. Confirm it, and Spotify will start gathering your data.
3. Turn on Sync streams to prevent a gap in your data
4. Wait until you receive your data
This can take a while. As Spotify states:We're currently gathering a copy of your personal data. This shouldn't take longer than 30 days. But don't worry, we'll send you an email when it's ready.That's still quite a long wait, but trust me: it's worth it :)
5. Download and extract the files
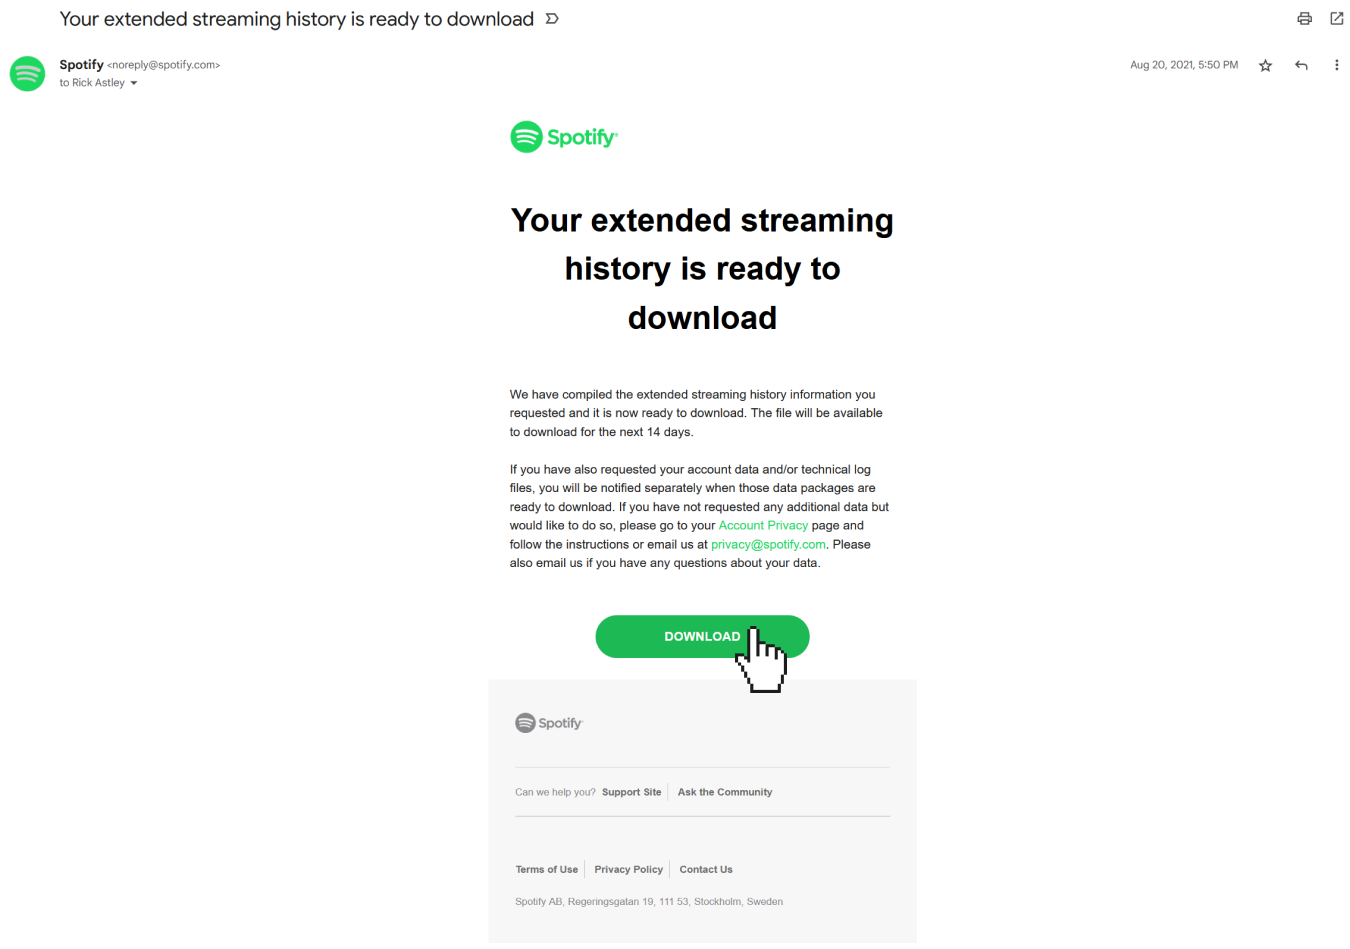
Once your data is ready to download, you'll get an email with a link to download a .ZIP file. You need to extract this file before proceeding. You can learn how to extract .ZIP files on this page.
Never share your files with others! The data may contain a lot of personal information, depending on what Spotify has sent you.
6. Import your files
After you downloaded the files to your device and extracted them, you can choose between either uploading the files via the stats.fm web import page or via the integrated in-app import on mobile.
- Web Import
- App Import
When you have received your .json files, go to https://stats.fm/import, and make sure you are logged in. You can either drag and drop the files in the designated area or click on the area to open a file picker. Select the files you want to upload and confirm the upload. The files will be placed in a queue and once you are ready, press the Upload button in the top right to start the upload.
Your files will now be processed, this can take a few minutes.
If you don't like staring at a webpage for a long time, you can close the tab while your streams are being processed.
To import your files via the app, open the stats.fm app. Then click on the settings icon in the top right of the screen. In the menu that opens, click on "Import files".
On the page you just landed on, you can click the "Upload your data" button to open the file picker. Locate the files you want to upload and click on them. Finally, the files are prepared to be uploaded in the Upload queue, confirm the upload by utilizing the Upload button and the files are being processed.
No importable files present in the files you received? Check out this article.
Once your streams have reached the stats.fm servers, they need to be processed. Duplicate streams will be filtered out, and there will be a lot of calculations made for each stream in order to save it securely in the database. This can take a while. Depending on the amount of streams and the amount of people importing their streams at once, this can take just a few seconds up to a couple of hours. For every uploaded file, you will receive a notification from the stats.fm app about the status of the uploaded file.
File import failed? Please attempt to upload the errored file(s) again.
7. Ready to go!
Congratulations! You can now view your full listening history, play count, and much more. Your future streams will be synced to the database automatically.