Spotify Import Guide
To be able to import your Spotify streaming history, you need to have stats.fm Plus.
1. Solicita tus datos de Spotify
In order to request the extended streaming history files, simply press the correct buttons on the Spotify website.
To get started, open the Privacy page on the Spotify website.
Scroll down to the "Download your data" section.
Configure the page so it looks like the screenshot below (Unticked the "Account data" and ticked the "Extended streaming history" boxes).
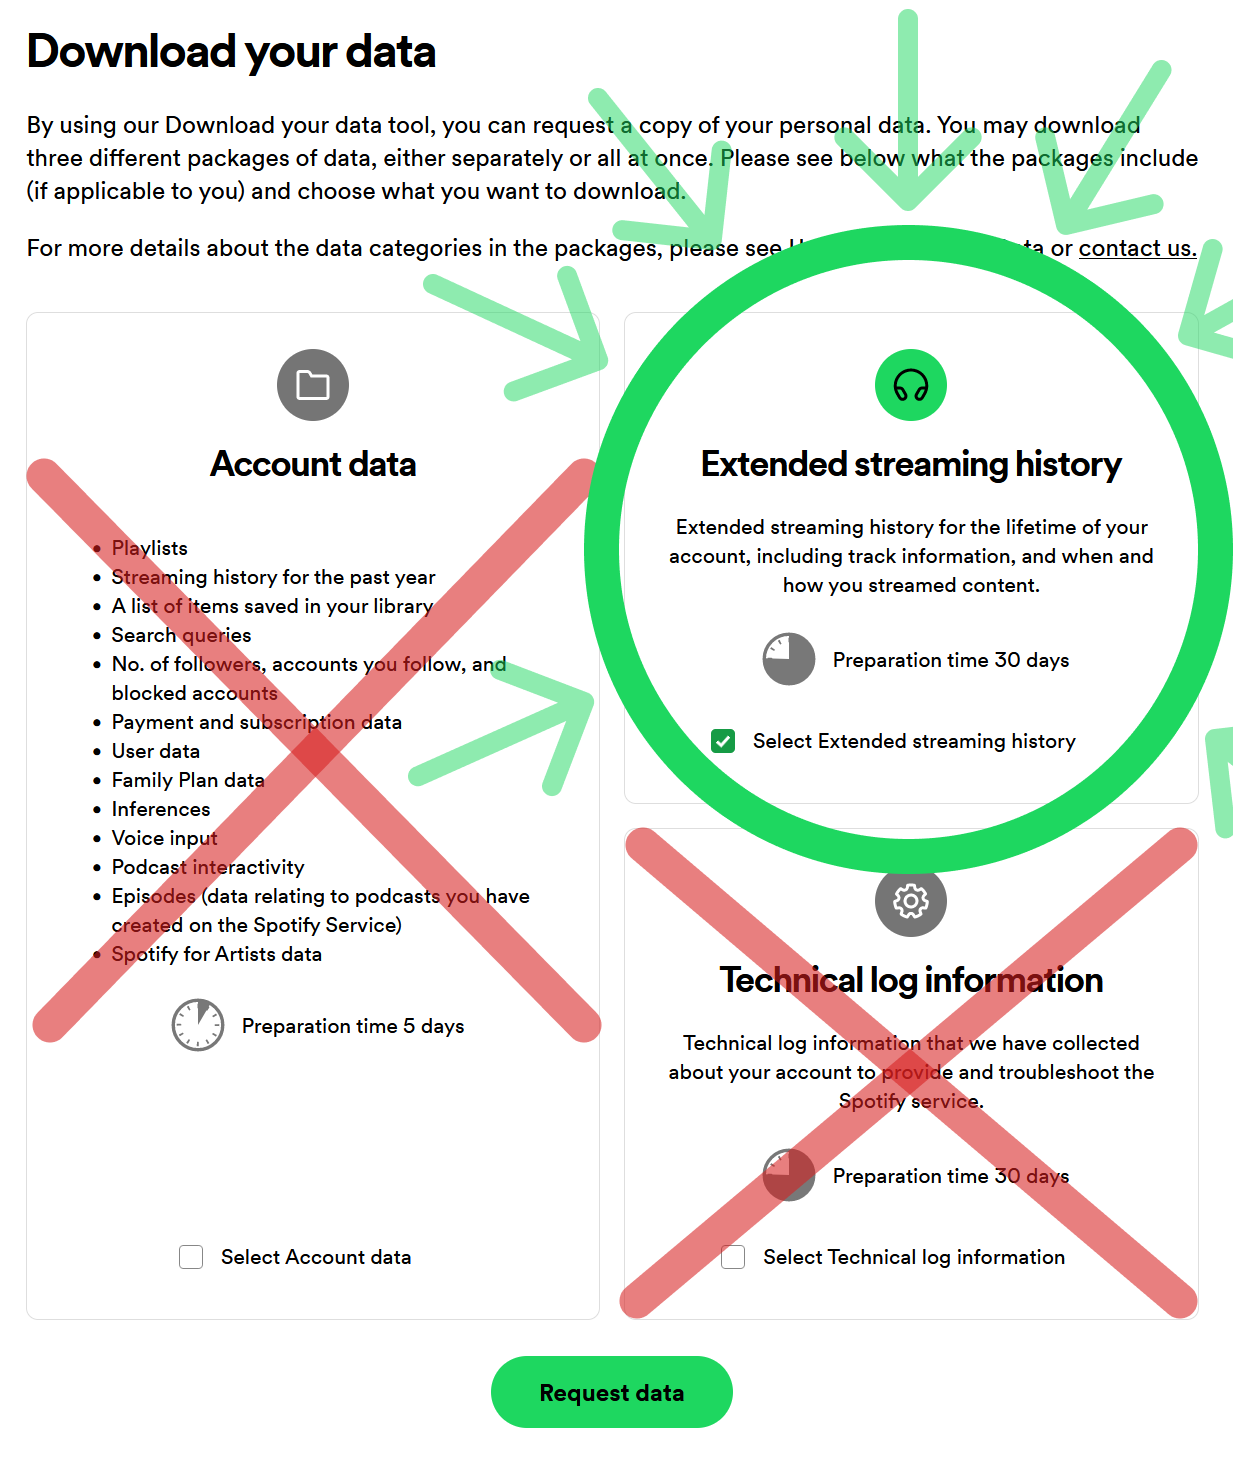
Press the "Request data" button.
2. Confirma tu solicitud
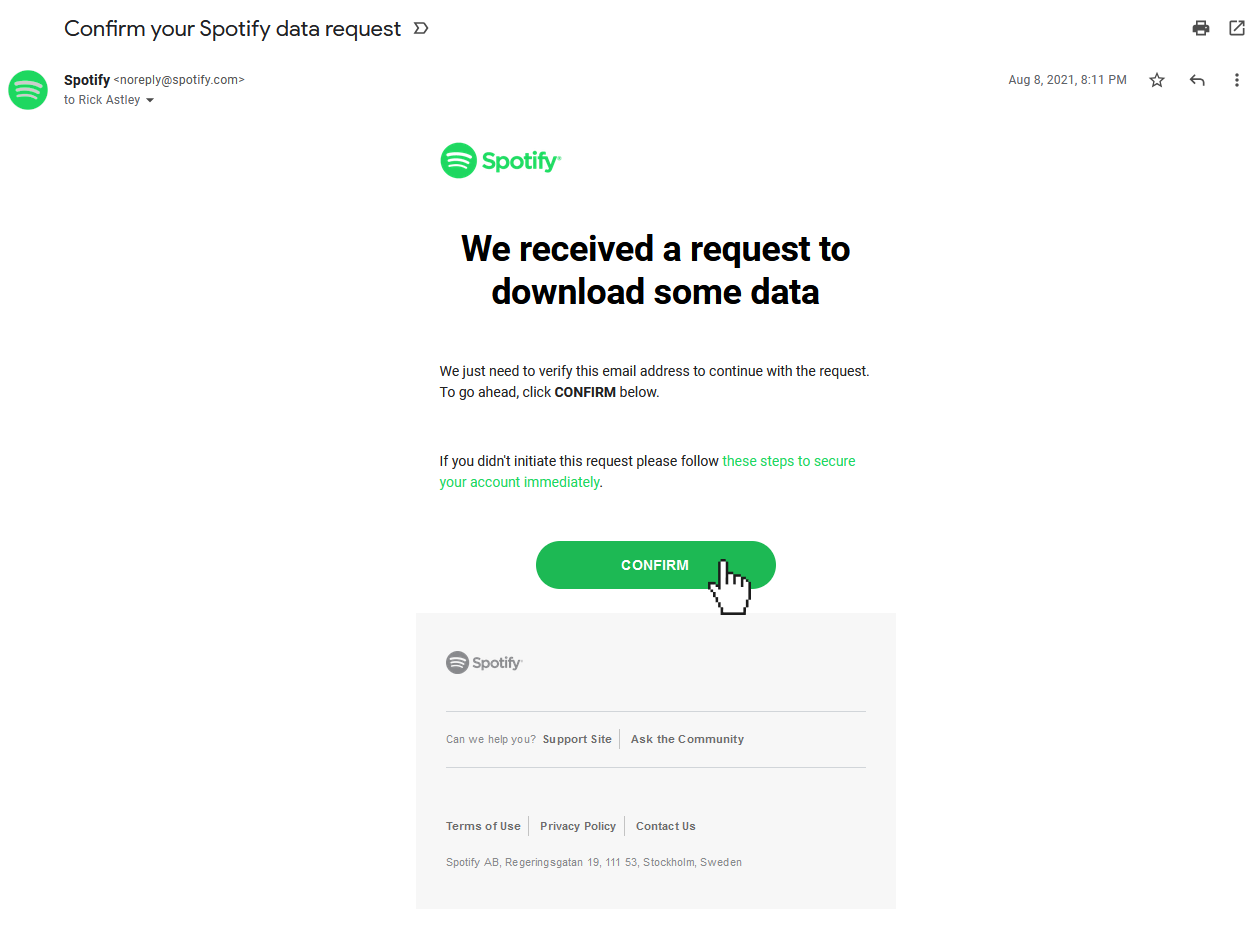
Tan pronto como tu solicitud sea aceptada por Spotify, recibirás un enlace para confirmar la solicitud en tu correo electrónico. Confírmala y Spotify comenzará a recolectar tus datos.
3. Turn on Sync streams to prevent a gap in your data
4. Espera hasta que recibas tus datos
This can take a while. As Spotify states:We're currently gathering a copy of your personal data. This shouldn't take longer than 30 days. But don't worry, we'll send you an email when it's ready.That's still quite a long wait, but trust me: it's worth it :)
5. Descarga y extrae los archivos
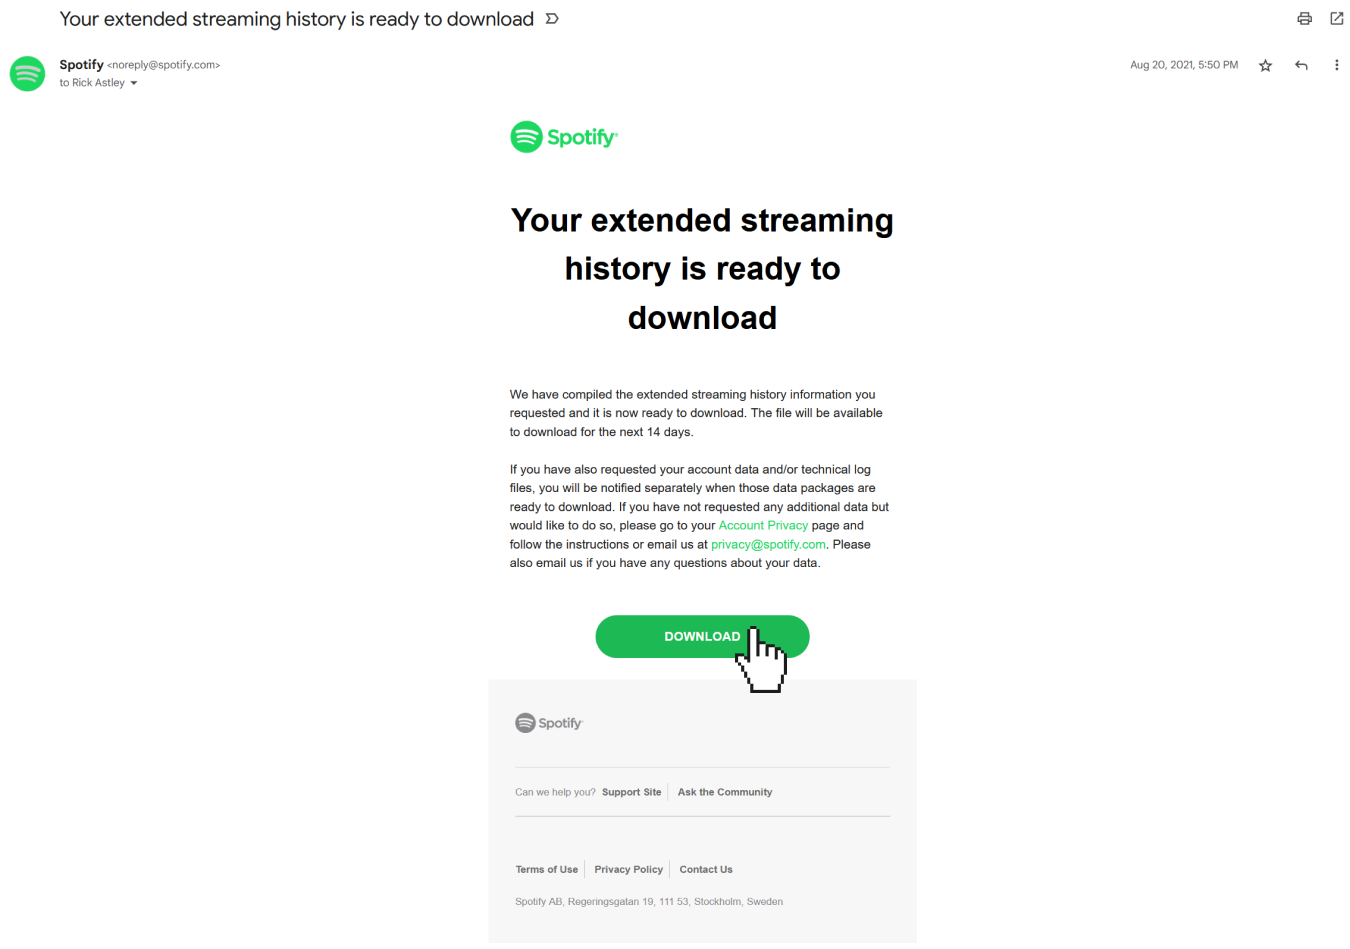
Una vez que tus datos estén listos para descargar, recibirás un correo electrónico con un enlace para descargar un archivo .ZIP. Necesitas extraer este archivo antes de continuar. Puedes aprender cómo extraer los archivos ZIP en esta página.
¡Nunca compartas tus archivos con otros! Los datos pueden contener mucha información personal, dependiendo de lo que Spotify te haya enviado.
6. Import your files
After you downloaded the files to your device and extracted them, you can choose between either uploading the files via the stats.fm web import page or via the integrated in-app import on mobile.
- Web Import
- App Import
When you have received your .json files, go to https://stats.fm/import, and make sure you are logged in. You can either drag and drop the files in the designated area or click on the area to open a file picker. Select the files you want to upload and confirm the upload. The files will be placed in a queue and once you are ready, press the Upload button in the top right to start the upload.
Your files will now be processed, this can take a few minutes.
Si no te gusta estar mirando a una página web durante mucho tiempo, puedes cerrar la pestaña mientras tus reproducciones están siendo procesadas.
To import your files via the app, open the stats.fm app. Then click on the settings icon in the top right of the screen. In the menu that opens, click on "Import files".
On the page you just landed on, you can click the "Upload your data" button to open the file picker. Locate the files you want to upload and click on them. Finally, the files are prepared to be uploaded in the Upload queue, confirm the upload by utilizing the Upload button and the files are being processed.
No importable files present in the files you received? Check out this article.
Once your streams have reached the stats.fm servers, they need to be processed. Duplicate streams will be filtered out, and there will be a lot of calculations made for each stream in order to save it securely in the database. This can take a while. Depending on the amount of streams and the amount of people importing their streams at once, this can take just a few seconds up to a couple of hours. For every uploaded file, you will receive a notification from the stats.fm app about the status of the uploaded file.
File import failed? Please attempt to upload the errored file(s) again.
7. ¡Listo!
¡Enhorabuena! Ahora puedes ver tu historial de reproducción completo, conteo de reproducciones, y mucho más. Tus futuras reproducciones se sincronizarán con la base de datos automáticamente.